How to run an Adobe Connect server
Adobe Connect Server is another online platform for holding classes and meetings, like BBB, that is available at avanetco. Adobe Connect can be installed on Windows, and many admins choose it for its ease of maintenance.
Adobe Connect Server can be installed in a cluster or as a standalone server. To avoid complications, this guide covers the standalone scenario.
Pre-installation checks:
- Ports that must be open in the firewall: 80, 443 and 1935.
- Adobe Connect Server uses port 1935 for its own protocol to transfer real-time data, and ports 80 and 443 to serve the service over the web.
- One IP address, a domain and an internet connection.
- A user with admin privileges other than the Windows local Administrator.
ADOBE CONNECT SERVER INSTALLATION:
- Download the file from the adobe site and extract it.
- Run installer.exe from this path, replacing X to match your setup: X:\Connect\xxx\Disk1\InstData\VM
- Choose Deploy Adobe Connect and enter the admin credentials.
- Enter your purchased serial number and proceed to the next step.
- In this step you choose how your database is installed: either on a remote server or on the local server. (If Microsoft SQL is already installed, the installer won’t install it again.)
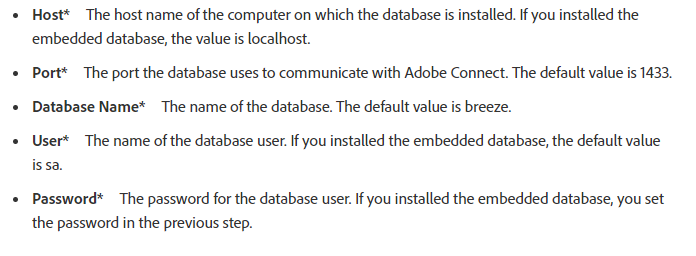
- Now enter your database information as shown below:
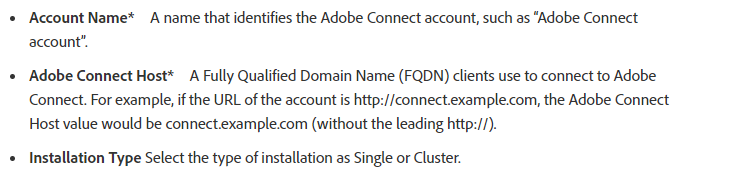
- Now enter the network settings as shown below:
- In this step you choose the storage configuration. There are two parameters:
- A storage address for data and recordings.
- Content cache size: a number between 0 and 100 percent, where 0 disables the option. Adobe suggests keeping it in the range of 15-50 %.
Complete the remaining steps based on the services you want. If you need help, check the Adobe Help Center for more information.